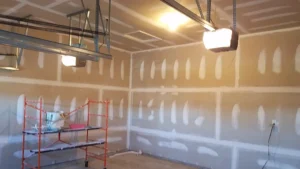
Ceiling issues are very common in homes which in turn see a great deal of drywall repair on ceiling surfaces after water damage from leaks, cracks, or accidents which is a different story from repair work done to walls. Also unlike wall repair, what we put in and how we finish it up is a challenge because of gravity which is always pulling down. But with the right tools, preparation, and techniques home owners can get their ceiling to that smooth professional look without having to replace the whole thing.
Common Causes of Ceiling Drywall Damage
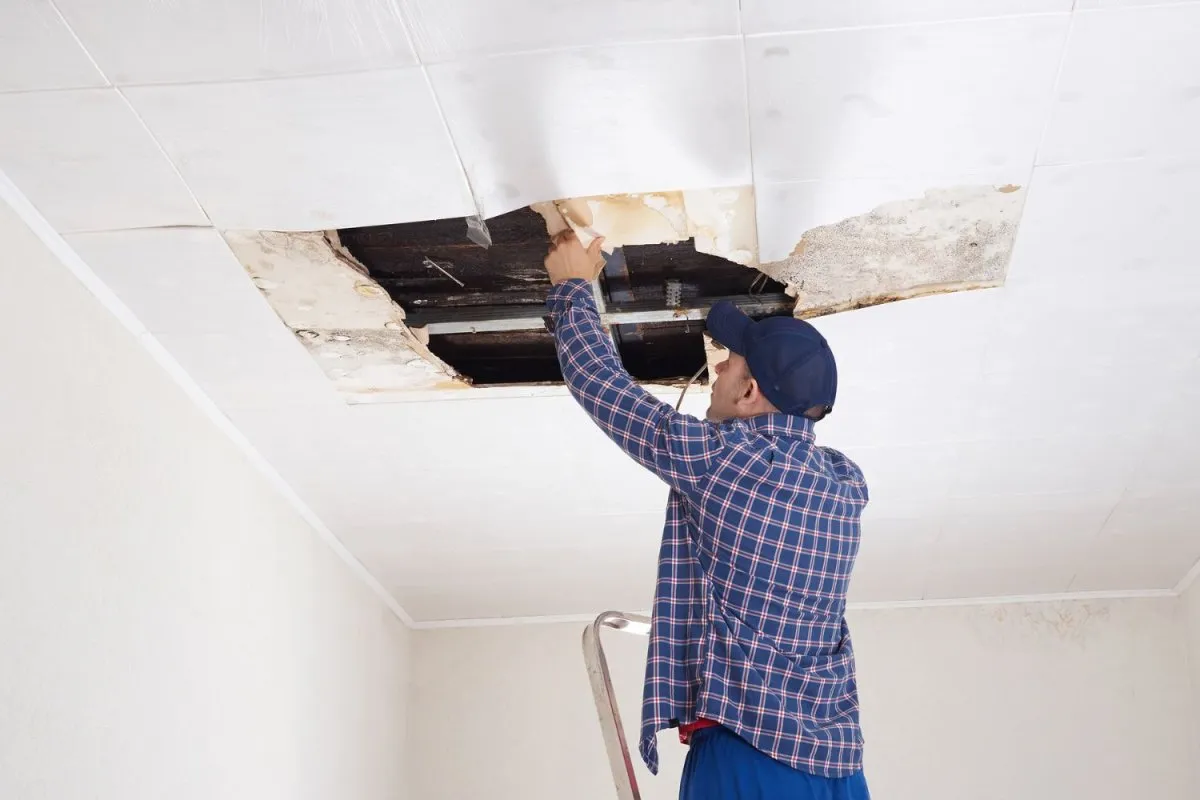
Ceiling drywall is also a victim of many issues. From broken plumbing to roof defects, or that which comes from upper floor bathrooms we see a great deal of damage. With time this water incepted entry into the drywall causes it to sag and also produce marks. Also the moisture which enters the gypsum core over time causes it to crumble out.
Structural changes is also a common issue. What happens is that homes settle over time and that movement may produce hairline cracks at joints or corners. Also poor drywall panel installation will cause joint lines to open up.
Accidents happen which also cause damage. From time to time we see damage from heavy items, from the installation of a ceiling fan, or from work in the attic. As for the cause of the damage what we do is to get right on it and repair the drywall in the affected areas which in turn will help to prevent any more damage.

Types of Ceiling Drywall Damage
Different which types of ceilings are affected require slightly different repair techniques.
Hairline Cracks
Small at joints and corners you will see what are mostly of the fact to be cracks. These cracks which also may put in appearance due to structural settlement or joint tape failure.
Medium Holes
Holes that are a result of hardware removal, accidents, or minor impact are included in this category. We usually repair them with patching material and joint compound.
Large Holes or Sagging Panels
When drywall is weakened by water damage or impact full sections may give way or collapse. In these cases we see large parts of the drywall panel have to be replaced.
Water Stains and Soft Areas
Moisture weakens drywall and causes peeling paint or spongy surfaces. Fix the water source issue first before repairing.
In each case drywall repair on ceiling is different, but at a base level the repair process is the same.
Tools and Materials Needed
For successful drywall repair of ceilings you will need the right tools and supplies. They also play a key role in achieving a smooth and durable finish.
- Drywall patch or replacement panel
- Joint compound
- Drywall tape
- Putty knife or drywall knife
- Sanding sponge or sandpaper
- Drywall screws
- Utility knife
- Ladder or scaffold
- Primer and ceiling paint
Using high quality materials which in turn improves adhesion and also reduces what we see of the seams or what is an uneven texture after we finish.
Step-by-Step Drywall Repair on Ceiling
Rehabilitating ceiling drywall requires many precise steps for a best results.
Inspect the Damage
The first action is to assess the extent and cause of the damage. Look for water leaks, loose drywall panels, or damaged framing. Address any root issues before you begin repairs.
Remove Damaged Material
Remove any loose or crumbly drywall with a utility knife. Out fit material out and to have a better bond between the patch and the surrounding surface which is also a plus.
Install a Drywall Patch
For small holes apply a drywall patch or mesh tape right over the damage. For large holes cut out a new piece of drywall which fits the opening and attach it with drywall screws to the ceiling frame or support boards.
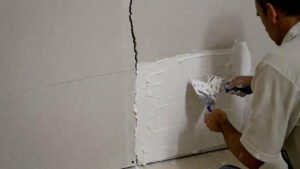
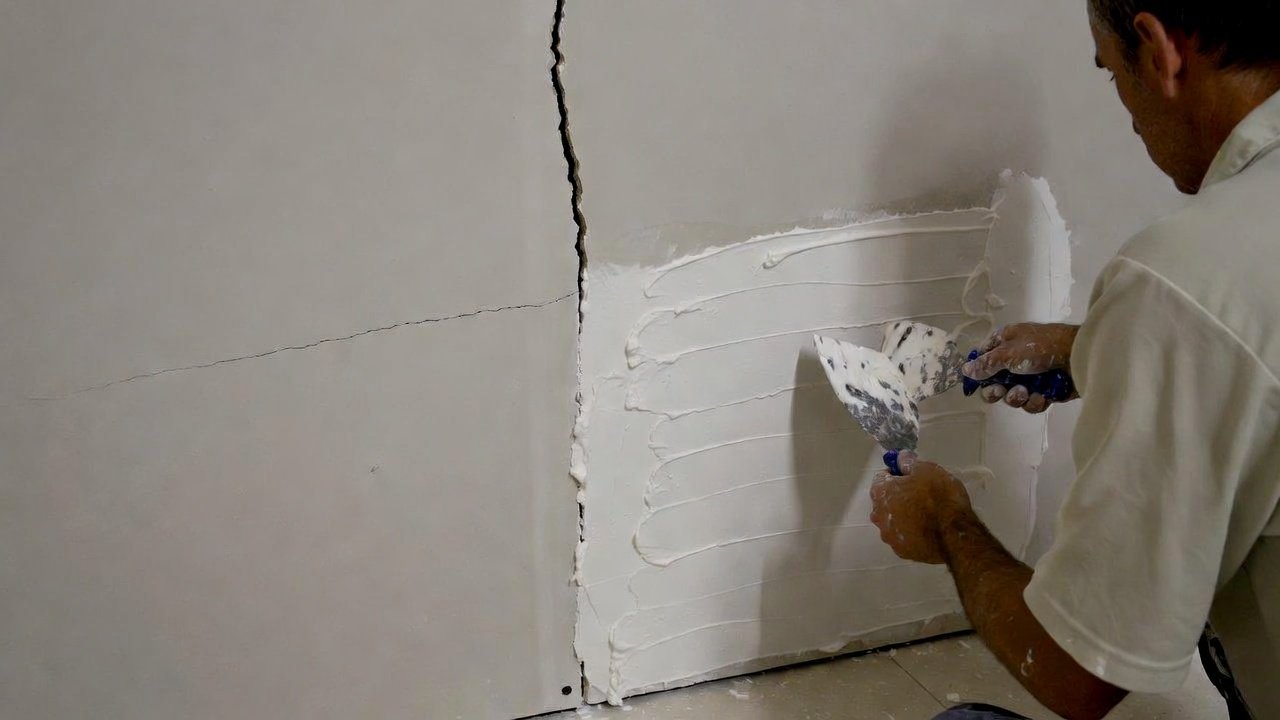
Apply Joint Compound
Spread out joint compound over the patch with a drywall knife. Blend the edges out to match the surrounding ceiling. Let the compound dry through fully.
Sand the Surface
Once you allow the compound to dry out, go in with sandpaper to remove any high spots, and prepare the surface to be smooth. This step is critical for a perfect repair.
Apply Additional Coats
Most for most ceiling repairs we use two or three thin layers of joint compound. Also go over each layer with sandpaper before putting on the next.
Prime and Paint
After completion of the final sanding apply primer to seal the repair. For the final touch use ceiling paint which matches the present color and texture.
This process repairs the ceiling surface and also sees to it that the drywall in the affected areas of the room is made to blend in with the rest of the space.

Tips for a Smooth Ceiling Repair
Working at a ceiling is difficult as materials must stick while put in a vertical position. A few practical tips improve the result.
Apply light layers of joint compound instead of heavy coats. Light applications dry faster and reduce the risk of sagging. Also allow for adequate drying time between coats.
Use a large drywall knife to sand out edges and reduce the visibility of repair lines. For best results in blending the patch into the rest of the ceiling, properly feather the material out.
Light out is also key. Check the repair out at different lighting angles to see out of place areas before painting.
When to Call a Professional
Some for which professional help is required are ceiling repairs. If the affected area is great in size, has structural issues, or is a result of very heavy water damage, by which point you may not do it yourself anymore and instead leave it to professionals which include drywall technicians that will see to it that the repair is both safe and durable.
Professionals do that which home owners may have trouble to re-create.
Hiring professional drywall workers which is what we do for this trade saves time, also improves the quality of repair and at the same time we prevent recurring issues.
Maintaining a Damage-Free Ceiling
Prevention of drywall damage is easy which in turn sees to it that you do not have to repair it. Through regular home maintenance you may reduce the incidence of ceiling issues.
Check out plumbing lines, roof areas, and attic spaces for signs of leaks. As soon as you see a moisture problem, take care of it to prevent drywall from deteriorating.
Secure ceiling mounts in place properly and avoid to put excessive weight on ceiling components, Also keep indoor humidity consistent to maintain integrity of the drywall.
Ceilings with proper care may last for many years.
Final Thoughts
In most cases drywall repair on ceiling issues is a doable project which requires patience and the right techniques. From small cracks to moderate sized holes most ceiling repairs follow a set process of inspection, patching, smoothing and painting.
Identifying what causes drywall damage and which repair method to use will give you the best results. At home or at the hands of a professional contractor proper ceiling repair brings back the structural integrity and look of your interior space.